Golf Cart Controller Blinking Lights: Complete Error Code Guide

Controller blinking lights indicate specific fault codes in your golf cart's electrical system. Most red blink patterns point to wiring issues, throttle sensor failures, or controller overheating. This guide decodes each pattern and shows you exactly how to fix the problem.
When your golf cart controller displays blinking lights, it’s talking to you. Each flash pattern identifies exactly what’s wrong. A blinking red light typically points to controller faults, throttle sensor issues, wiring problems, or overheating. Count the number of flashes in each sequence—most controllers use 1-9 blinks followed by a pause to signal different faults. Understanding these codes helps you diagnose the problem quickly and order the right replacement parts from our controller collection.
Quick Diagnosis Checklist
- Count the blinks: Watch the LED through 2-3 complete cycles and count flashes before each pause
- Check battery voltage: Low voltage (below 36V on 48V systems) triggers fault codes
- Inspect throttle connections: Loose or corroded throttle sensor wiring causes 60% of controller errors
- Feel for heat: Touch the controller body—excessive heat indicates overload or ventilation blockage
- Test the key switch: Faulty ignition switches create intermittent power that mimics controller faults
- Examine main power cables: Corroded B+ and B- terminals reduce current flow and trigger protection modes
- Check motor connections: Loose motor wires cause arcing that the controller detects as a fault
- Review recent modifications: New accessories or aftermarket parts may exceed controller capacity
What Does a Single Blink (1 Flash) Mean?
What it indicates: A single flash signals a throttle position sensor (TPS) low voltage fault. Your controller isn’t receiving the proper signal from the accelerator pedal—it thinks the throttle is disconnected or reading zero volts when it should show a baseline of 0.5-1.0V.
Symptoms you’ll notice:
- Cart won’t move when you press the pedal
- No response from accelerator in either direction
- Error appears immediately when you turn the key on
- May be intermittent—works sometimes, fails others
How to test: Set your multimeter to DC voltage and locate the throttle sensor connector (usually a 3-wire connector near the pedal or under the seat). With the key on and cart in neutral, backprobe the signal wire (typically green or yellow). You should read 0.5-1.0V at rest and 3.5-4.5V at full throttle.
If you read zero volts or the voltage doesn’t change, the sensor has failed.
How to fix: Replace the throttle position sensor. Make sure you order the correct version for your make and model—Club Car IQ systems use different sensors than EZGO TXT models. Clean all connector terminals with electrical contact cleaner before installing the new sensor. Apply dielectric grease to prevent future corrosion.
Parts needed: Browse our controller and sensor collection to find the throttle sensor for your specific model. Most replacements include new connector pigtails.

Difficulty: Easy | Time: 15-30 minutes
Why Is My Controller Blinking 2 Times?
What it indicates: Two blinks signal a high throttle voltage fault. The controller is reading excessive voltage from the throttle sensor (above 4.8V), which triggers a safety shutdown. This prevents runaway acceleration and protects you from unintended movement.
Symptoms you’ll notice:
- Error code appears before you touch the pedal
- Cart creeps forward slowly without pedal input
- Cannot engage forward or reverse
- Releasing the pedal doesn’t clear the fault
How to test: With the key on and your foot OFF the pedal, measure voltage at the throttle sensor signal wire. You should read 0.5-1.0V at rest. If you’re reading 3.5V or higher with no pedal input, the sensor is providing false information.
Check for pinched wires that might be creating a short to the 5V reference wire.
How to fix: Inspect the throttle sensor wiring harness for damage, especially where it routes through the pedal pivot area. Look for wire insulation worn through by rubbing. If wiring is intact, replace the throttle sensor. On Club Car models, also check the throttle return spring—a weak spring may not fully release the sensor arm.
Parts needed: Throttle position sensor and potentially the pedal return spring assembly.

Difficulty: Easy | Time: 20-40 minutes
What Causes 3 Blinks on the Controller?
What it indicates: Three flashes point to a main contactor fault. The controller has sent the signal to engage the main contactor (the heavy-duty relay that connects battery power to the motor), but it’s not detecting the expected voltage change. Either the contactor coil has failed, the contacts are welded, or there’s a wiring issue in the contactor circuit.
Symptoms you’ll notice:
- No clicking sound when you press the pedal
- Cart completely dead despite good batteries
- Sometimes a single click but no movement
- Battery voltage present but no power to motor
How to test: Turn the key on and listen for the main contactor click when you press the pedal. No click means the coil isn’t energizing. With a multimeter, check for 12V (on 48V systems) or proportional voltage at the contactor coil terminals when the pedal is pressed.
If voltage is present but no click, the contactor coil is bad. If you hear a click but still get the fault, the main contacts inside have failed.
How to fix: Replace the main contactor. These are high-current components that wear out over time. On Club Car DS and Precedent models, the contactor is located under the seat near the controller. EZGO TXT/RXV models mount it on the battery compartment wall.
Always disconnect the negative battery cable before replacing contactors.
WARNING: Contactors carry full battery voltage and hundreds of amps. Never work on them with batteries connected. Use insulated tools only.
Parts needed: Find the correct main contactor in our Club Car electrical parts section or equivalent for your make.
Difficulty: Moderate | Time: 30-45 minutes
Why Does My Cart Show 4 Flashes?
What it indicates: Four blinks indicate a motor overheat or controller overheat condition. Modern controllers monitor temperature and shut down when they exceed safe operating limits (typically 160-180°F for controllers, 200°F for motors).
This protects components from permanent damage.
Symptoms you’ll notice:
- Error appears after heavy use or hill climbing
- Cart was working fine, then suddenly quit
- Controller or motor feels hot to the touch
- Cart works again after 15-30 minutes cooling
- More common in hot weather or with heavy loads
How to test: Let the cart cool completely. If the error clears after cooling, you’ve confirmed a thermal shutdown. Check for blocked ventilation around the controller—dust buildup or debris restricts airflow. On motor overheats, spin the motor by hand with the cart on jack stands. It should rotate smoothly.
Grinding or tight spots indicate bearing wear that causes friction and heat.
How to fix: For controller overheating, clean the heat sink fins and ensure proper airflow. Verify you’re not exceeding the controller’s rated amperage with oversized motors or excessive loads. For motor overheating, inspect motor brushes (if applicable), check bearing condition, and verify proper motor cable sizing.
Undersized cables create resistance and heat.
When it’s a bigger problem: Repeated thermal shutdowns mean your controller is undersized for your application. If you’ve added a lift kit, larger tires, or frequently carry heavy loads, you may need to upgrade to a higher-amperage controller.
Parts needed: Potentially a higher-rated controller or motor brushes and bearings depending on diagnosis.
Difficulty: Moderate to Advanced | Time: 1-2 hours
What Does 5 Blinks Mean on My Golf Cart?
What it indicates: Five flashes signal a battery pack low voltage fault. Your controller requires a minimum voltage to operate safely (typically 33V minimum on 36V systems, 44V on 48V systems). When pack voltage drops too low, the controller shuts down to prevent battery damage from over-discharge and to avoid erratic operation.
Symptoms you’ll notice:
- Error appears when attempting to drive up hills
- Cart worked fine on level ground, then quit on incline
- Headlights dim noticeably when pressing pedal
- Recent decrease in range before error appears
- More common at end of charge cycle
How to test: Measure total pack voltage with a multimeter. On a 48V system, you should read 50-52V when fully charged, never below 44V under load. Check individual battery voltages—one weak battery in the series string drags down the entire pack.
Load test each battery. Weak cells show voltage collapse under load even if resting voltage looks OK.
How to fix: Charge the batteries fully using your onboard charger. If the fault persists after charging, you have one or more failed batteries. Replace all batteries as a set—mixing old and new batteries causes the weak ones to fail even faster.
Verify your charger is working correctly. Defective chargers undercharge batteries and create this fault.
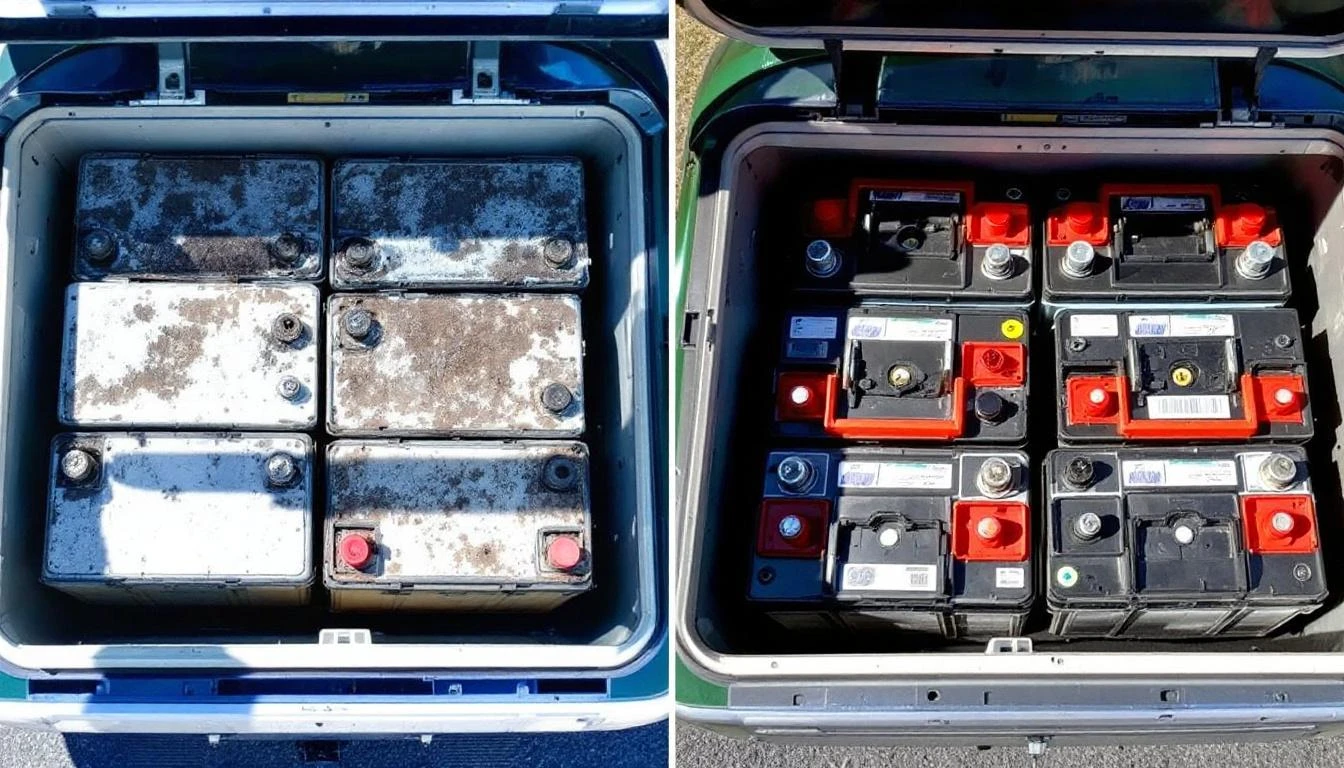
Battery replacement rule: When one battery fails in a golf cart, replace the entire set. Batteries age together, and mixing old with new reduces the new battery’s lifespan by 60%.
Parts needed: Complete battery set (six 8V or four 12V depending on system) and potentially a charger if it’s not maintaining batteries properly.
Difficulty: Moderate | Time: 1-2 hours for battery replacement
Understanding 6-9 Blink Patterns and Other Error Codes
6 Blinks – HPD (High Pedal Disable): The controller detected throttle input when you turned the key on. This safety feature prevents the cart from lurching forward unexpectedly. Release the pedal completely, turn the key off, wait 5 seconds, then turn the key back on with your foot off the pedal.
7 Blinks – Controller Internal Fault: The controller’s internal diagnostics have detected a circuit board failure, damaged MOSFET transistors, or corrupted programming. This requires controller replacement.
It’s rare but can occur after lightning strikes, reverse polarity connections, or voltage spikes from jumping the cart incorrectly.
8 Blinks – Motor Stall Protection: The controller detected the motor is drawing current but not rotating (stalled). Common causes include seized brakes, blocked wheels, or actual motor failure. Check that parking brake is released, wheels rotate freely, and nothing is jammed in the drivetrain.
9 Blinks – External Shutdown: An external safety device has signaled the controller to shut down. On Club Car Precedent models, this includes the OBC (onboard computer), charger interlock, or tow/run switch. On EZGO RXV, check the key switch and forward/reverse switch connections.
Brand-Specific Variations
Club Car IQ System: Uses a more complex fault system displayed on the dashboard. Wrench icons and specific number codes appear. Common codes include F-01 (throttle fault), F-02 (motor fault), F-03 (communication error).
The IQ system requires dealer-level diagnostics for some faults.
EZGO with Curtis Controllers: May display solid red light for critical faults versus blinking for less severe issues. Some models use yellow and red lights together—yellow indicates warning, red indicates shutdown fault.
Yamaha Drive/Drive2: Uses a combination of beeps and lights. Two beeps with solid red indicates throttle fault. Continuous beeping indicates controller overheat. Check your owner’s manual for model-specific codes.
When to Call a Professional
Many controller faults are DIY-fixable. But some situations require professional help.
Call a certified technician when:
- You’ve replaced the controller and fault codes persist—indicates a deeper electrical problem
- You’re uncomfortable working with high-voltage battery systems (48-72V can be dangerous)
- Multiple fault codes appear simultaneously—suggests communication bus failures
- You don’t own a multimeter or have limited electrical experience
- The cart has aftermarket modifications and you’re unsure about wiring
- You smell burning plastic or see melted wires near the controller
- Fault codes appeared after water exposure—may require complete electrical system inspection
What to tell your technician: Write down the exact blink pattern, when it started, what you were doing when it occurred, and any recent maintenance or modifications. This information saves diagnostic time and money.
Cost expectations: Professional diagnosis typically runs $75-150. Controller replacement labor adds $150-300 depending on cart model and location. Getting the code translated and confirming the diagnosis yourself before calling saves money.
Prevention Tips to Avoid Controller Faults
Monthly maintenance prevents 70% of controller issues:
- Keep connections clean: Spray all electrical connections with contact cleaner every 3 months. Corrosion creates resistance that triggers fault codes.
- Maintain proper battery voltage: Charge after every use. Deep discharges stress the controller and create low-voltage faults.
- Check battery water levels: Low water in flooded batteries increases internal resistance and voltage fluctuations that confuse controllers.
- Protect from moisture: Install a weather-resistant cover over the controller if you store your cart outdoors. Water intrusion causes most internal controller failures.
- Avoid overloading: Don’t exceed your cart’s rated capacity. Continuous overload operation degrades controller components and triggers thermal shutdowns.
- Clean the controller heat sink: Use compressed air to blow dust and debris from cooling fins every 6 months. Blocked airflow causes overheating.
- Inspect wiring harnesses: Look for rubbed or frayed wires where harnesses pass through metal holes or contact moving parts. Add rubber grommets to protect wiring.
- Update to sealed connectors: Replace old-style crimp connectors with modern weather-resistant connectors to prevent moisture-related faults.
Special considerations for lithium battery conversions: If you’ve upgraded to lithium batteries, verify your controller is compatible. Lithium batteries maintain higher voltage under load, which some older controllers interpret as an overvoltage fault.
You may need a controller programmed for lithium chemistry.
Seasonal storage tip: Before long-term storage, fully charge the batteries and disconnect the negative cable. This prevents parasitic drain that creates low-voltage faults when you return to the cart months later.
Frequently Asked Questions
Can I still drive my cart if the controller is blinking?
No, you should not attempt to drive when the controller displays a fault code. The blinking light means the controller has detected an unsafe condition and disabled cart operation to protect you and the electrical system. Driving with a fault code can cause permanent damage to the controller, motor, or batteries. Diagnose and fix the problem before operating the cart again.
Will disconnecting the battery reset controller error codes?
Disconnecting the battery for 30 seconds will clear temporary fault codes from the controller’s memory, but if the underlying problem still exists, the fault code will return immediately when you reconnect and turn the key on. This reset technique is only useful for clearing nuisance codes caused by one-time events like a momentary voltage spike. It won’t fix actual component failures.
How much does a new golf cart controller cost?
Replacement controllers range from $250-800 depending on amperage rating and features. Basic 250-amp controllers for stock carts cost $250-400. Heavy-duty 400-500 amp controllers for modified carts run $500-800. Always match or exceed your original controller’s specifications. Browse our complete controller selection to find the right match for your make and model.
Why does my controller blink only when going uphill?
Uphill operation draws maximum current from your batteries. If the controller only faults under heavy load, you have weak batteries that can’t maintain voltage under stress, loose battery connections creating resistance, or undersized cables that drop voltage during high current draw. Test battery voltage while someone drives up a hill—voltage shouldn’t drop below 44V on a 48V system.
Can a bad charger cause controller error codes?
Yes, absolutely. A malfunctioning charger that undercharges batteries creates low-voltage faults. A charger that fails to shut off can overcharge batteries, increasing voltage beyond the controller’s maximum rating and triggering high-voltage faults. Some chargers also interface directly with the controller through an interlock circuit—charger faults in this circuit cause shutdown codes. Test your charger output with a multimeter to verify proper operation.
Do I need to replace the controller or can it be repaired?
Most modern golf cart controllers are sealed units that aren’t economically repairable. Internal component failures require specialized equipment and expertise that costs more than a new controller. Exception: external connection problems (corroded terminals, damaged connectors) are easily fixed without replacing the controller. If testing confirms the controller itself has failed internally (code 7 blinks), replacement is your only option.
What’s the difference between controller error lights and charger fault indicators?
Controller error lights blink when the key is on and indicate operational faults while driving. Charger fault indicators appear during charging and signal charging system problems—usually a solid red light or flashing light on the charger unit itself. If your cart won’t charge, check the charger’s indicator lights, not the controller. Charging problems require diagnosing the charger, batteries, and charger receptacle, which is separate from controller fault codes.
Can aftermarket accessories cause controller fault codes?
Yes, accessories draw current from the electrical system and can trigger faults several ways: added lights/radios may drain batteries below minimum voltage; lift kits with larger tires increase load and cause overheat faults; incorrectly wired accessories can create shorts that the controller detects. Always use proper gauge wire and fusing for accessories. If fault codes appeared immediately after adding accessories, disconnect them and see if the fault clears.