EZGO Golf Cart Brake Problems: Complete Repair & Replacement Guide

EZGO brake problems typically stem from worn shoes, cable stretch, contaminated drums, or low fluid in hydraulic models. Most issues show up as soft pedals, grinding sounds, or reduced stopping power—all fixable with basic tools and replacement parts in 1-3 hours.
If your EZGO golf cart brakes aren’t working properly, you’re likely dealing with one of four common culprits: worn brake shoes (most common on mechanical systems), stretched or frayed cables, contaminated brake drums, or low hydraulic fluid on newer models. Most EZGO brake issues are DIY-fixable with basic hand tools and quality replacement parts in under three hours.
Below, we’ll walk you through identifying exactly what’s wrong and how to fix it safely.
Quick Diagnosis Checklist
Work through this list in order—these are ranked by frequency based on what we see most often:
- Worn brake shoes or pads – Causes soft pedal, requires more pressure to stop, grinding noise (80% of mechanical brake issues)
- Stretched or damaged brake cable – Pedal goes to floor with little resistance, uneven braking (mechanical systems only)
- Contaminated brake drums/rotors – Squealing sounds, reduced stopping power even with new shoes
- Low hydraulic fluid – Spongy pedal feel, brake warning light (hydraulic models like newer TXT/RXV)
- Misadjusted brake linkage – Brakes engage too early or too late in pedal travel
- Seized parking brake – Cart won’t move or drags heavily, burning smell
- Damaged master cylinder – Fluid leaks, pedal slowly sinks to floor (hydraulic only)
- Corroded brake hardware/springs – Brakes don’t release fully, uneven pad wear
Are Your Brake Shoes Worn Out?
Symptoms: This is the number one brake problem on EZGO carts with mechanical drum brakes. The pedal travels farther before the cart stops. You need to push harder than usual. Or you hear metal-on-metal grinding when braking.
On steep hills, stopping distance increases noticeably.
How to Test: Remove the rear wheels and brake drums (two bolts per drum on most models). Examine the brake shoes—they should have at least 1/8″ of friction material remaining. If you can see the metal shoe backing or notice deep grooves in the material, they’re done.
Also check for uneven wear patterns, oil contamination (shoes will look dark and shiny), or cracking.
How to Fix: Replacing brake shoes is straightforward on EZGO models. You’ll need a brake spring tool (makes life much easier), penetrating oil, and new shoes. Remove the hold-down springs, disconnect the actuating cable or linkage, pull the old shoes, clean the backing plate thoroughly with brake cleaner, then install new shoes.
Make sure the springs seat properly—incorrect installation causes uneven braking. Adjust the cable tension so there’s about 1″ of pedal free play before the brakes engage.
Browse our complete selection of golf cart brake parts including EZGO-specific shoe sets. Difficulty: Moderate | Time: 1.5-2 hours for both rear wheels
⚠️ Safety Warning: Never blow brake dust with compressed air—use brake cleaner and wipe with rags. Older brake materials may contain asbestos. Always test brakes in a safe area before normal operation.
Is Your Brake Cable Stretched or Broken?
Symptoms: The brake pedal goes almost to the floor with little resistance. The pedal feels “loose” with excessive play. One side may brake harder than the other.
On some EZGO models with cable-operated systems, you might see the cable housing pulled away from its mounts or frayed cable strands near connection points.
How to Test: With the cart off and parking brake released, press the brake pedal slowly while someone watches the cable movement at the rear axle. The cable should pull smoothly without binding. Look for frayed strands, rust, kinks in the housing, or a cable that’s stretched beyond the adjustment range.
Check where the cable attaches to the brake lever on the axle—if the adjuster is threaded all the way out and you still have excessive pedal travel, the cable has stretched.
How to Fix: Cable replacement requires disconnecting at both ends—the pedal assembly under the seat and the brake actuating lever on the rear axle. Route the new cable through the frame following the original path, ensuring it doesn’t rub on the driveshaft or sharp edges.
EZGO uses specific cable lengths for different model years, so verify your cart’s year and model before ordering. After installation, adjust tension so the brake shoes contact the drums when the pedal is 1/3 to 1/2 way down.
Find the correct brake cable for your specific EZGO model in our EZGO parts section. Difficulty: Moderate | Time: 45 minutes to 1 hour
Compatibility Note: EZGO Marathon, TXT, and older models use different cable lengths and attachment styles. Measure your old cable or verify your serial number when ordering.
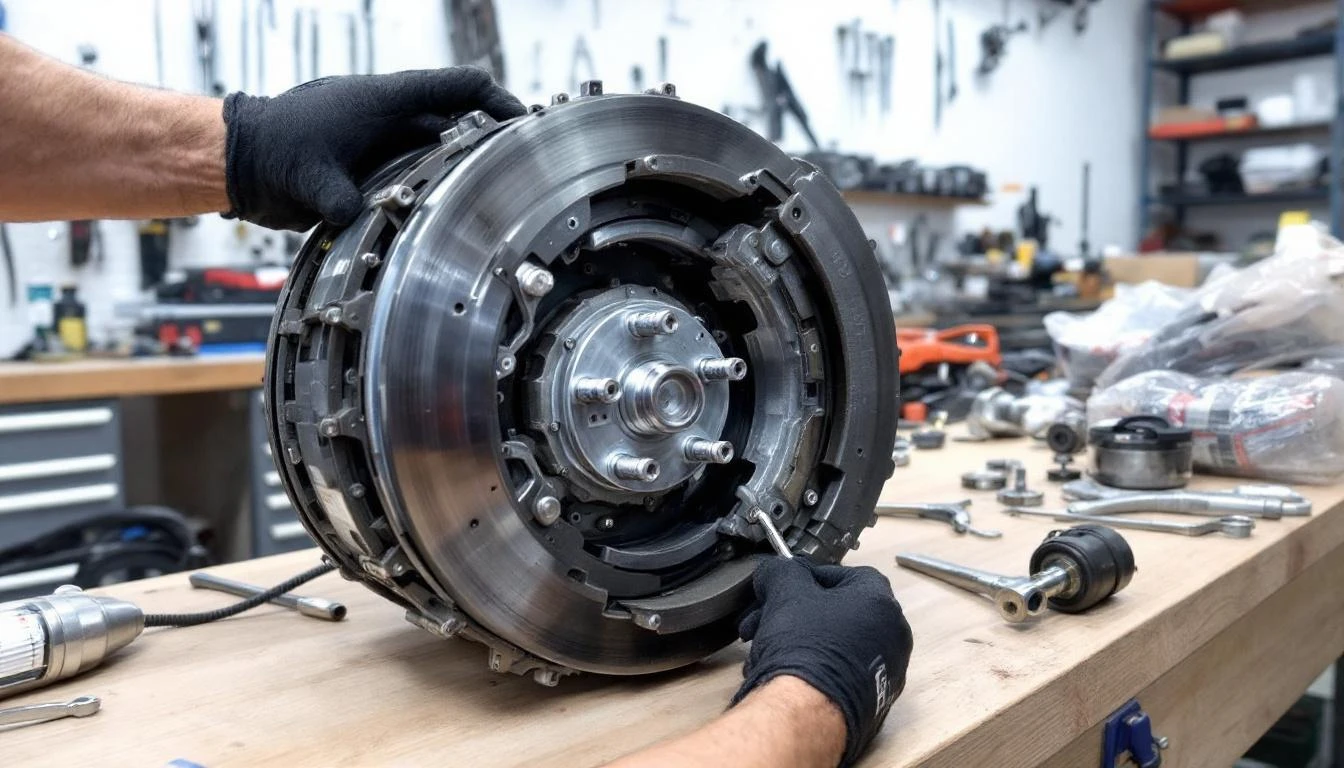
Are Your Brake Drums Contaminated or Scored?
Symptoms: Squealing or squeaking when braking. Reduced stopping power even after installing new brake shoes. Pulsating pedal feel, or a burning smell after driving. You may also notice the cart pulls to one side when braking hard.
How to Test: Remove the brake drums and inspect the friction surface. Run your finger around the inside—it should feel smooth. Deep grooves, heat discoloration (blue or brown patches), hard glazed surfaces, or oil contamination all indicate problems.
Minor surface rust is normal on carts that sit, but heavy rust pitting requires drum replacement. If you see oil inside the drum, you likely have a leaking axle seal that must be fixed first.
How to Fix: Light scoring can sometimes be cleaned up with sandpaper (150-grit), but deep grooves or heat damage require drum replacement. Heavily glazed drums can be deglazed with 80-grit sandpaper in a crosshatch pattern.
If oil contamination is present, replace the axle seal before installing new shoes—otherwise the new parts will be ruined immediately. Clean drums thoroughly with brake cleaner and let dry completely. Never use oil or grease on braking surfaces.
Difficulty: Easy to Moderate | Time: 30 minutes per side (drum cleaning), 2+ hours (if replacing drums and seals)
Pro Tip: When replacing drums, always do both sides to maintain even braking. Mismatched drums cause the cart to pull during stops.
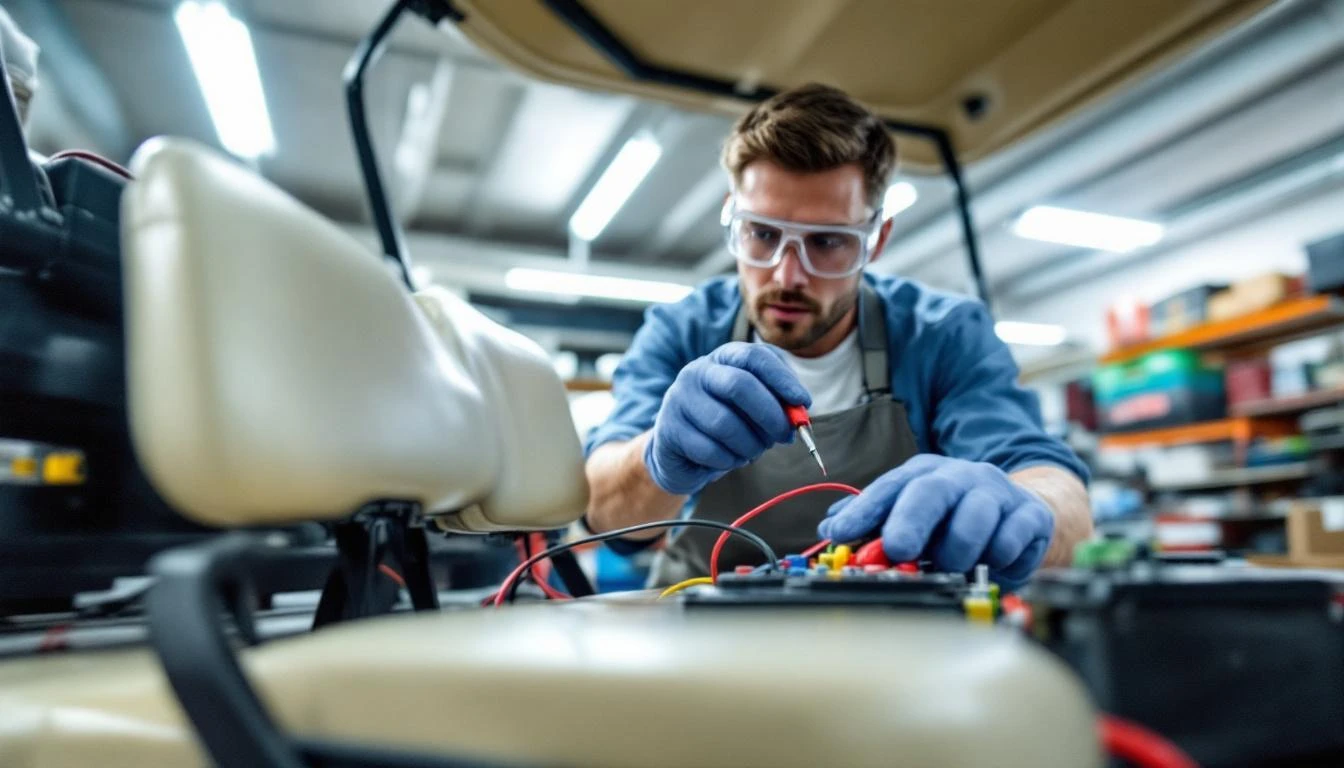
Is Your Hydraulic Brake Fluid Low or Contaminated?
Symptoms: This applies to newer EZGO models (2008+ TXT, RXV, and most Lithium models) with hydraulic disc brakes. You’ll feel a spongy or soft pedal, notice the pedal slowly sinking to the floor when held, or see the brake warning light illuminated on the dashboard.
Stopping power gradually decreases.
How to Test: Locate the brake fluid reservoir—typically under the driver’s seat near the master cylinder. The fluid level should be between the MIN and MAX marks. Check the fluid color: it should be clear to light amber. Dark brown or black fluid indicates contamination and moisture absorption.
Look for leaks around the master cylinder, brake lines, and caliper fittings. Wet spots or fluid drips mean you have a leak that must be addressed.
How to Fix: If fluid is just low (no leaks), top off with DOT 3 brake fluid—never overfill past the MAX line. If the fluid is contaminated or you’ve found leaks, the system needs bleeding after repairs.
Fix any leaks first (common points: master cylinder seals, brake line fittings, caliper pistons). Bleeding requires two people: one pumps the pedal while the other opens/closes the bleeder valve at each caliper. Start with the wheel farthest from the master cylinder. Repeat until no air bubbles appear in the discharged fluid.
Difficulty: Easy (topping off), Moderate to Advanced (bleeding and leak repair) | Time: 15 minutes (top-off), 1-2 hours (full system bleed and leak repair)
⚠️ Safety Warning: Brake fluid damages paint—wipe spills immediately. Always use fresh, sealed brake fluid. Contaminated fluid significantly reduces braking performance and can cause complete brake failure.
Are Your Brakes Misadjusted?
Symptoms: Brakes grab immediately when you barely touch the pedal, or conversely, the pedal goes very far down before braking begins. The parking brake may not hold on hills. Or the brakes might drag slightly when driving (causing premature wear and reduced speed).
How to Test: Press the brake pedal—you should feel initial free play of about 1″ before resistance begins. Braking should start when the pedal is roughly 1/3 to 1/2 of its total travel.
Jack up the rear wheels and spin them by hand with the brake released; they should rotate freely without dragging. With parking brake engaged, wheels should be locked solid.
How to Fix: On mechanical EZGO brakes, locate the cable adjuster at the rear axle brake lever. Loosen the lock nut and turn the adjuster to increase or decrease cable tension. Tighten until there’s 1″ of pedal free play, then apply the brake fully several times and recheck—cables settle during initial use.
For parking brake adjustment, there’s usually a separate adjuster near the pedal assembly. On hydraulic systems, adjustment is minimal (pads self-adjust), but you may need to adjust the pedal stop or switch position.
Difficulty: Easy | Time: 15-20 minutes
Testing Protocol: After any brake adjustment, test in a safe, open area at slow speeds first. Gradually increase speed and test stopping power before normal use.
Is Your Parking Brake Seized?
Symptoms: The cart won’t move or moves very slowly even with the parking brake released. You might smell burning, notice excessive battery drain (electric models working hard against the brake), or see smoke from the rear wheels.
The brake lever may be stuck in the engaged position.
How to Test: With the cart off, try moving the parking brake lever—it should move smoothly and return fully when released. Jack up the rear wheels and try rotating them by hand with parking brake off. If they won’t spin or drag heavily, the parking brake hasn’t released.
Check the cables for rust, kinks, or broken strands. Sometimes the brake shoes themselves rust to the drums on carts that sit for months.
How to Fix: If the cable is seized, spray penetrating oil at the cable ends and housing, work the lever back and forth, and let it soak overnight. Often the cable will free up. If not, cable replacement is necessary.
For shoes rusted to drums, you may need to back off the adjuster completely, tap the drum with a rubber mallet while trying to rotate the wheel, or in severe cases, carefully apply light heat to the drum (not the axle seals). Once freed, disassemble, clean all rust, lubricate pivot points with high-temp brake grease, and reassemble.
Difficulty: Easy to Moderate | Time: 30 minutes to 1.5 hours depending on severity
Prevention: If you store your cart for extended periods, release the parking brake and chock the wheels instead. This prevents the brake shoes from rusting to the drums.
Is Your Master Cylinder Failing?
Symptoms: Hydraulic brake systems only. The pedal slowly sinks to the floor when held down, even though there are no visible external leaks. You may notice fluid weeping from the back of the master cylinder or around the pedal pushrod boot.
Braking power is inconsistent—sometimes normal, sometimes weak.
How to Test: With the cart stationary, pump the brake pedal several times to build pressure, then hold firm pressure. The pedal should stay in position. If it slowly sinks over 30-60 seconds, internal seals are leaking.
Check for fluid around the master cylinder mounting area and inside the rubber boot where the pushrod enters. Remove the reservoir cap and have someone press the pedal—you shouldn’t see bubbles or fluid spurting back into the reservoir (indicates failed internal seals).
How to Fix: Master cylinder replacement is the solution—rebuild kits exist but are rarely worth the labor for the small cost savings. Disconnect the brake lines (be ready for fluid spillage), unbolt the master cylinder from its mount, install the new unit, reconnect lines, and bleed the entire system thoroughly.
Some master cylinders come pre-filled and ready to install; others require bench bleeding before installation to remove air from the cylinder itself.
Difficulty: Moderate to Advanced | Time: 1.5-2.5 hours including bleeding
⚠️ Important: After master cylinder replacement, the brake system must be bled completely. Test extensively in a safe area before normal operation. Compare our Club Car brake parts if you need cross-reference information for hydraulic components.
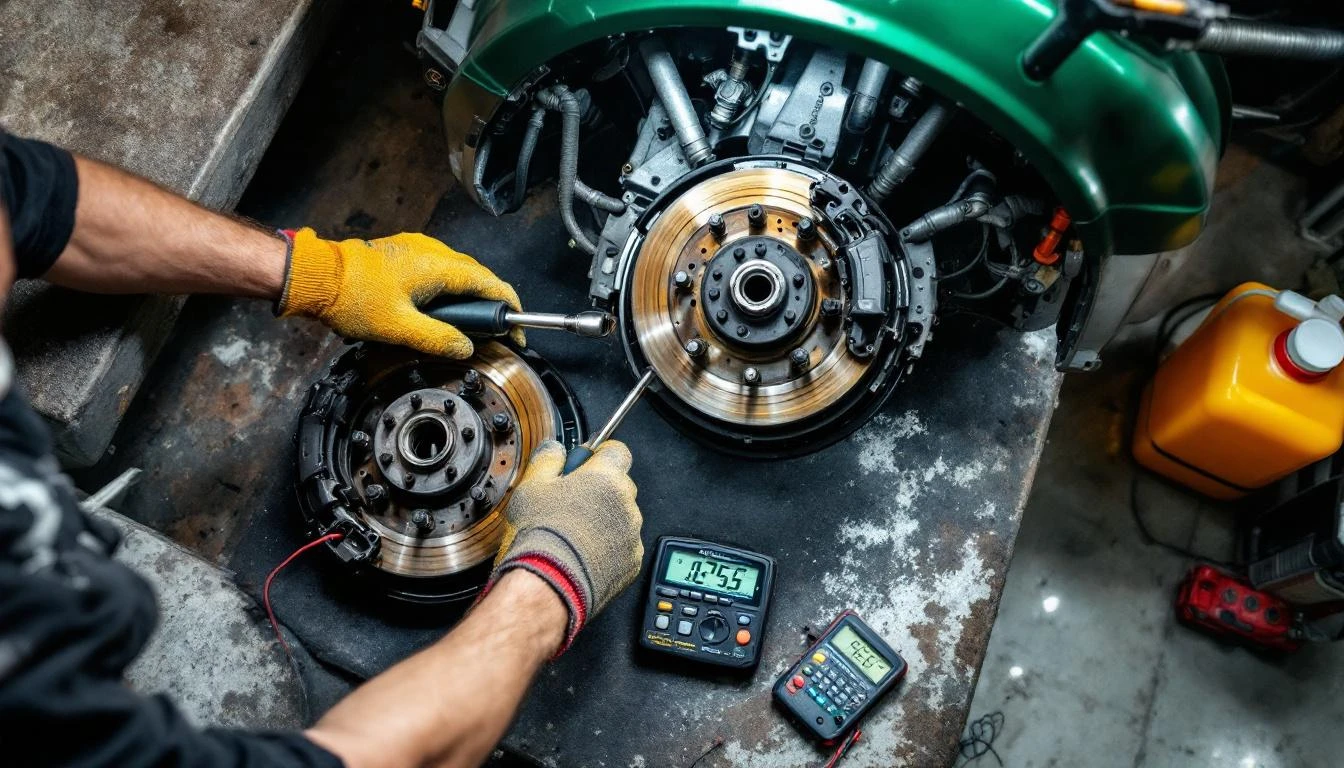
Are Your Brake Springs and Hardware Corroded?
Symptoms: Brakes don’t release fully after you let off the pedal, causing drag, reduced speed, excessive battery use, and rapid brake shoe wear. You may notice one wheel gets hotter than the other, or the cart pulls to one side.
Brake shoes wear unevenly or develop glazed spots.
How to Test: Remove the brake drums and inspect all springs—return springs, hold-down springs, and any adjuster springs. They should be intact with no rust, stretching, or broken coils. Press each shoe by hand; it should return to its rest position quickly when released.
Check all pivot points and slides for rust or frozen movement. On carts that sit outside or in humid areas, hardware corrosion is common.
How to Fix: Replace all springs and hardware as a set—they’re inexpensive and critical for proper brake function. Most brake shoe kits include new hardware. Clean all backing plate surfaces with a wire brush and brake cleaner, then apply a thin coat of high-temp brake grease to pivot points and slide surfaces (never on friction surfaces).
Ensure springs are installed in correct positions—improperly positioned springs cause all sorts of problems.
Difficulty: Moderate | Time: 1-2 hours for both wheels
Pro Tip: Take photos before disassembly or work on one side at a time so you have a reference for spring positioning. Spring orientation matters for proper shoe retraction.
When to Call a Professional
While many EZGO brake repairs are DIY-friendly, some situations warrant professional help:
- Complete brake failure: If your brakes suddenly stop working entirely, don’t attempt to diagnose while driving. Have the cart towed or very carefully moved to a repair facility.
- Hydraulic system repairs if you’re uncomfortable: Brake systems are safety-critical. If you’re unsure about bleeding procedures, finding leaks, or master cylinder replacement, professional service is worth it.
- Axle seal leaks: While not extremely difficult, replacing axle seals requires specific tools and knowledge of differential service. Oil contamination ruins new brake parts immediately, so this must be done correctly.
- Unusual noises you can’t identify: Grinding is usually worn shoes, but if you hear clunking, clicking, or knocking from the brake area, there may be damaged backing plates, loose hardware, or wheel bearing issues.
- Brake problems after a collision: Even minor impacts can bend backing plates, damage hydraulic lines, or misalign components. Have a professional inspect the entire brake assembly.
- Recurring problems after you’ve made repairs: If brakes fail again quickly after your repairs, there’s likely an underlying issue you’ve missed—uneven weight distribution, damaged frame mounts, or incompatible parts.
Remember, brakes are your cart’s primary safety system. If you have any doubts about your repair, seek professional assistance.
The cost of professional service is far less than the cost of an accident.
Prevention Tips to Avoid EZGO Brake Problems
Regular maintenance prevents most brake issues and extends component life significantly:
Monthly Checks:
- Test brake pedal feel—should be firm with 1″ of free play before engagement
- Listen for unusual sounds when braking (squealing, grinding, clicking)
- Check parking brake holds the cart on a moderate slope
- On hydraulic models, verify fluid level is between MIN and MAX marks
Every 6 Months or 50 Hours of Use:
- Remove drums and inspect shoe thickness and condition
- Check brake cable for fraying, rust, or excessive wear at attachment points
- Inspect brake springs for rust, stretching, or damage
- Clean and lubricate pivot points on backing plates (high-temp grease only)
- Check wheel bearings—loose bearings accelerate brake wear
Annually or 100 Hours:
- Replace brake shoes as a preventive measure if they’re more than 50% worn
- On hydraulic systems, consider replacing brake fluid (it absorbs moisture over time)
- Inspect all brake lines and fittings for cracks, leaks, or damage
- Check brake drum friction surfaces for scoring or contamination
- Verify proper brake adjustment after any service
Driving Habits That Extend Brake Life:
- Avoid riding the brakes—constant light pressure causes glazing and overheating
- Use engine braking on hills when possible (gas models) or regenerative braking (newer electric models)
- Don’t overload your cart beyond its rated capacity—excess weight accelerates brake wear
- Keep tires properly inflated—underinflated tires make brakes work harder
- Address brake problems immediately—small issues become big ones quickly
Storage Considerations:
- If storing for more than a month, release the parking brake and use wheel chocks instead
- Cover the cart or store indoors to prevent moisture accumulation on brake components
- Exercise brakes periodically during storage to prevent shoes from rusting to drums
- On hydraulic systems, check fluid level before and after storage periods
Shop quality EZGO replacement parts to keep your cart’s brake system in top condition. Using OEM-equivalent or better quality parts ensures reliable performance and safety.
Frequently Asked Questions
How often should I replace EZGO brake shoes?
Replace brake shoes when friction material is worn to 1/8″ thickness or less, typically every 2-3 years with average use. Heavy use, hilly terrain, or frequent towing accelerates wear—inspect every 6 months. If you hear grinding or notice significantly reduced stopping power, check immediately regardless of service interval.
Why do my EZGO brakes squeal even after replacing the shoes?
Squealing with new shoes usually indicates contaminated drums (oil, grease), glazed drum surfaces, incorrect shoe material (some aftermarket shoes are noisier), or missing/damaged anti-rattle hardware. Clean drums thoroughly with brake cleaner, lightly sand with 150-grit in a crosshatch pattern, and ensure all springs and clips are installed correctly. Bedding-in new shoes (10-15 gentle stops from moderate speed) also helps.
Can I use automotive brake fluid in my EZGO hydraulic brakes?
Yes, EZGO hydraulic brake systems use standard DOT 3 brake fluid, the same as most automobiles. Never substitute with DOT 5 (silicone-based) unless specifically designed for it—mixing types damages seals. Always use fresh, sealed brake fluid from a new container, as brake fluid absorbs moisture from air and degrades. Never reuse old fluid or leave containers open.
What causes one side of my EZGO to brake harder than the other?
Uneven braking typically results from misadjusted cables (mechanical systems), contaminated drum on one side, a seized or sticky brake shoe pivot, or uneven shoe wear. On hydraulic systems, check for a partially seized caliper piston or air in the brake line on the weaker side. Inspect both sides carefully—worn shoes on one side and good shoes on the other create this symptom.
How do I know if my EZGO has mechanical or hydraulic brakes?
Check under the driver’s seat: hydraulic systems have a brake fluid reservoir (small plastic tank) and master cylinder. Mechanical systems have only cables running to the rear axle. Generally, EZGO TXT models 2008 and newer, all RXV models, and Lithium-powered carts have hydraulic disc brakes. Older Marathon, TXT (pre-2008), and most gas models use mechanical drum brakes with cables.
Can I upgrade my EZGO from mechanical to hydraulic brakes?
While technically possible, it’s not practical or cost-effective for most owners. The upgrade requires a complete brake assembly, master cylinder, hydraulic lines, different wheels (in some cases), and significant fabrication. The cost approaches or exceeds the value of most older carts. Properly maintained mechanical brakes provide adequate stopping power. Focus on keeping your existing system in good condition.
Why does my brake pedal pulsate when stopping?
Pulsation indicates warped drums (heat damage) or rotors (hydraulic systems), unevenly worn shoes, or loose wheel bearings. Warping occurs from overheating—riding brakes on long descents or panic stops with poor-quality parts. Remove drums/rotors and check for heat discoloration and measure for warping with a dial indicator. Mild cases can sometimes be machined; severe warping requires replacement.
How tight should I adjust my EZGO brake cable?
Adjust cable tension so you have approximately 1″ of free pedal travel before feeling resistance, then brakes should engage firmly by the time the pedal is 1/3 to 1/2 way down. If adjusted too tight, brakes drag and wear prematurely; too loose and you get inadequate stopping power. After adjustment, apply the brake firmly several times—cables settle during initial use—then recheck and readjust if needed.